Pages

Friday, August 29, 2025

Done in Seven Steps: The Roof Installation Process

A leaking roof or crumbling shingles can turn your home into a battleground against rain and wind, leaving you stressed and vulnerable. Replacing it feels daunting, but it’s the key to restoring your peace and protecting your family. The roof installation process, completed in seven clear steps, transforms this challenge into a triumph. Skilled roofing contractors, like our team at Pro Craft Home Products in Toledo, work with precision to build a fortress over your home. Let’s explore how they do it.

Knowing the Process Brings Peace of Mind

A new roof protects your home from rain, wind, and sun, while adding charm and value. For homeowners, understanding the process lifts the mystery and helps you partner with your roofing contractor with ease. The journey typically takes one to three days for a standard home, depending on size and weather. Each step builds on the last, creating a seamless process that ensures quality. Here’s how it unfolds.

Step 1: Inspecting and Preparing the Roof

Roofer marking damaged shingles during inspection.

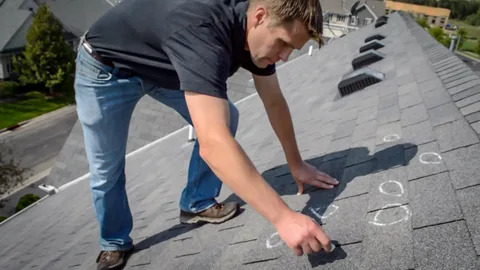
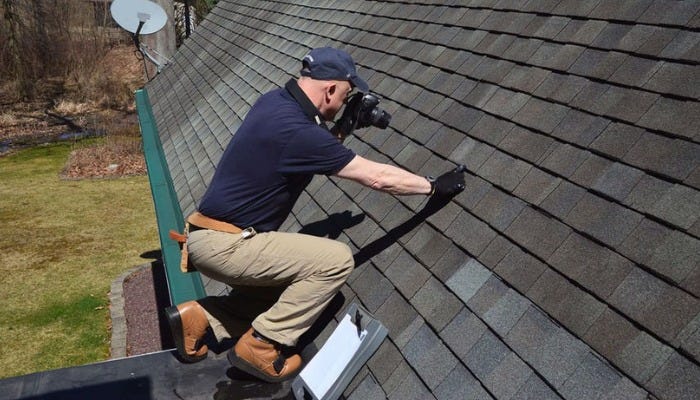
Every great roof begins with a careful look. Professional roofers start by examining the existing structure, checking for damage or weak spots. They focus on the roof deck, the wooden foundation beneath the shingles, to ensure it’s solid and free of rot. This initial inspection is crucial because it sets the stage for a sturdy roof. For a detailed look into this process, check out how a home roofing inspection works. Roofers also gather essential tools and materials, such as shingles, underlayment, and flashing, while clearing the work area. Homeowners are advised to move outdoor items like patio furniture to keep them safe. With the site ready and the deck assessed, the team moves forward to prepare the surface.

Step 2: Clearing Away the Old Roof

If you’re replacing an old roof, the next step is removing worn materials. Roofers carefully strip away old shingles, underlayment, and flashing to reveal the roof deck. This process is messy but vital, as leftover debris could weaken the new roof. Workers collect materials in a dumpster or tarp to keep your yard tidy. By clearing the slate, they ensure the roof deck is ready for inspection and repairs, creating a clean foundation for the next phase.

Step 3: Strengthening the Roof Deck

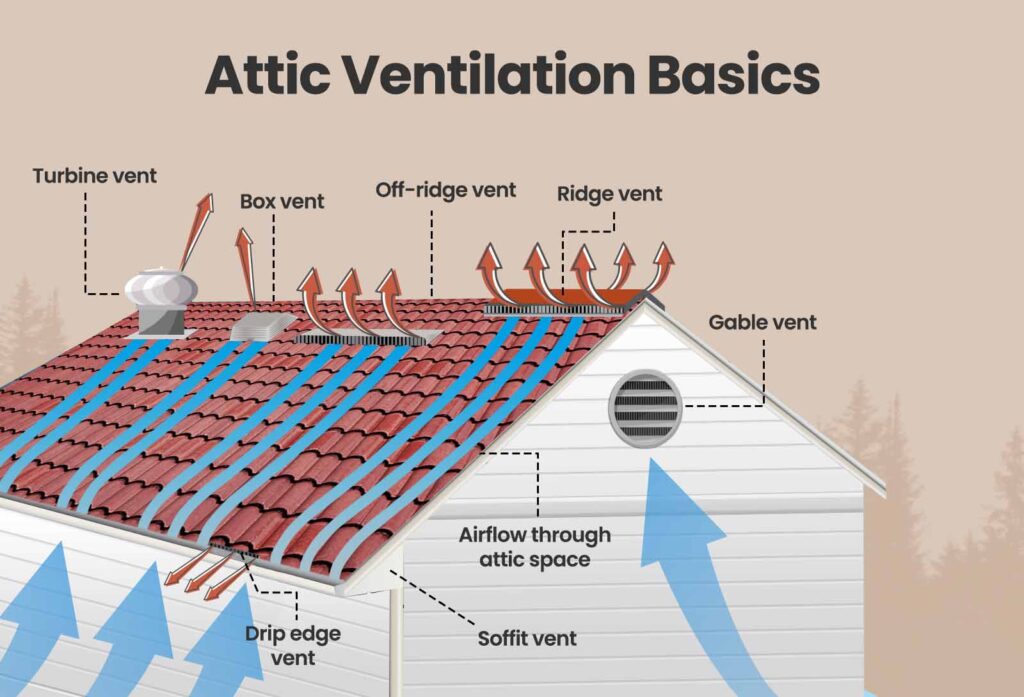
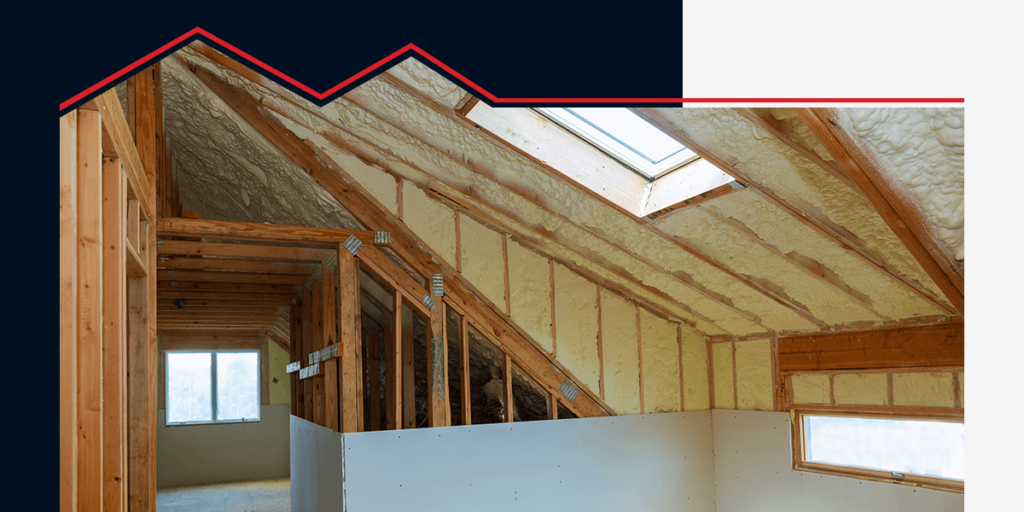
With the old roof gone, the focus shifts to the roof deck’s condition. Roofers repair any damaged wood, replacing warped or rotten boards to create a smooth, strong base. A solid deck is the backbone of your roof, so this step prevents future leaks or structural issues. They also check ventilation to ensure proper airflow, which keeps your home cool and dry. This reinforcement connects directly to the next step, as a strong deck supports the protective layers that follow.

Step 4: Laying the Underlayment

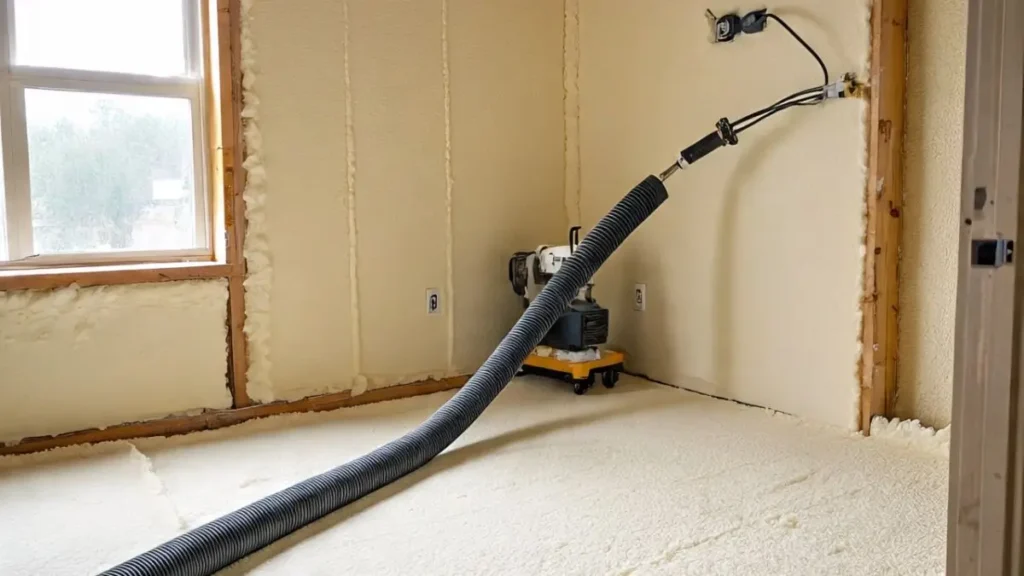
Now that the deck is solid, roofers add a protective underlayment, a water-resistant barrier that shields your home from moisture. They roll out synthetic or felt material, securing it tightly to the deck. In areas prone to heavy rain or snow, an ice and water shield is applied along edges and valleys for extra protection. This layer acts as a safety net beneath the shingles, ensuring your home stays dry even if the outer layer is damaged. With the underlayment in place, the roof is ready for its defensive features.

Step 5: Installing Flashing and Drip Edges

Close-up of roof valley flashing installed between asphalt shingles.
Roof flashing installed to protect water-prone areas.

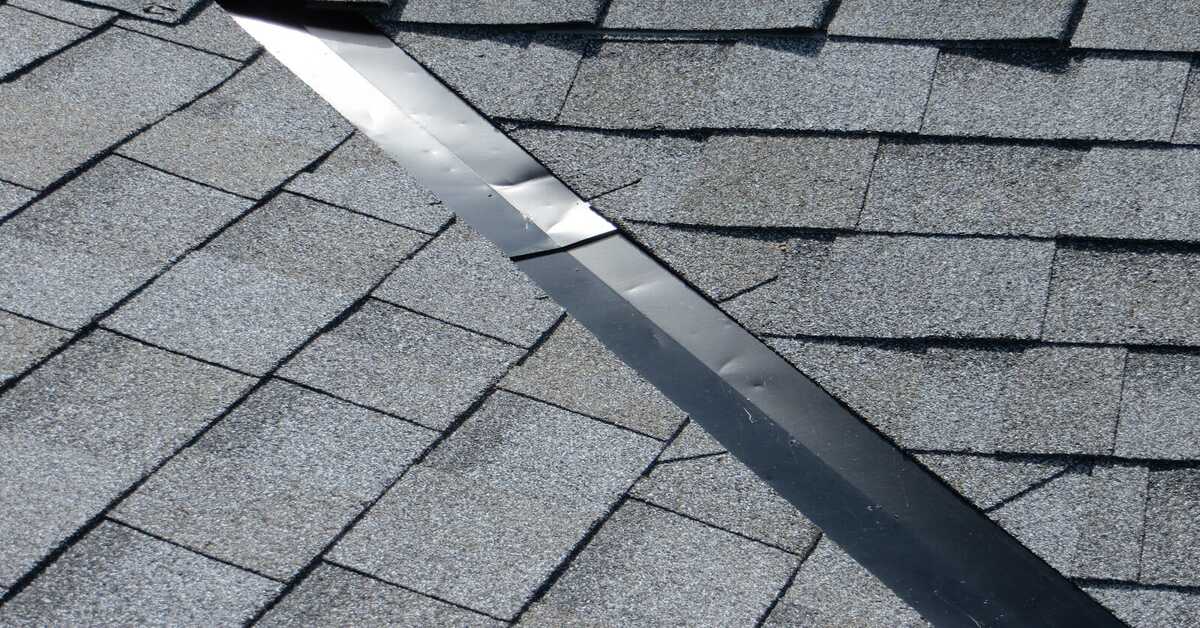
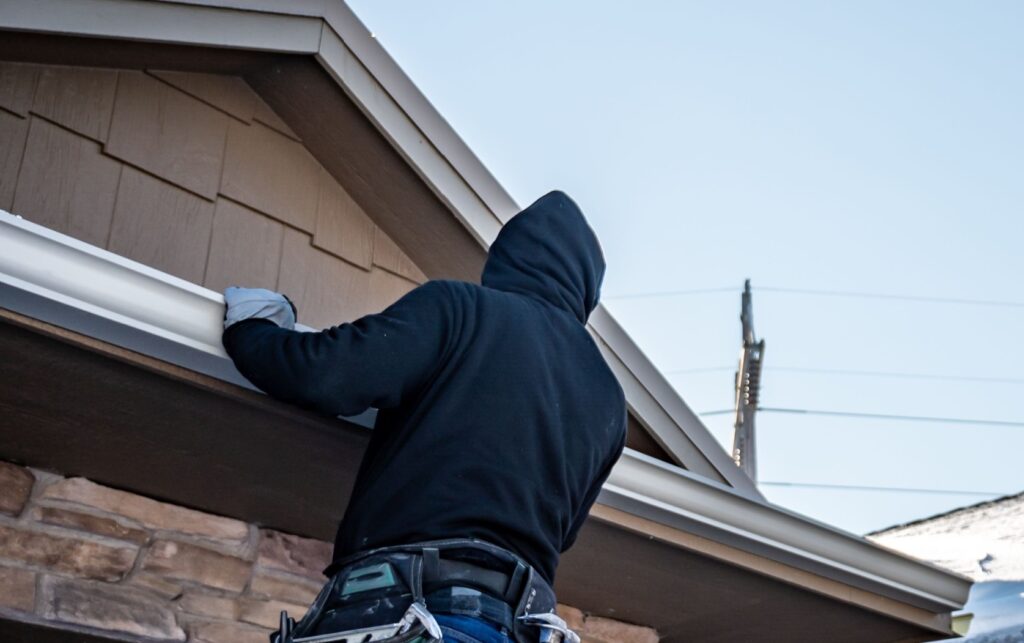
To fortify the roof, roofers add flashing, metal strips placed around chimneys, vents, and valleys to block water entry. These pieces are carefully sealed to create a watertight barrier. You can learn more about what flashing is in roofing and why it’s essential for long-term protection. Along the roof’s edges, drip edges guide water into gutters, protecting the wood beneath. This step builds on the underlayment by targeting vulnerable spots, ensuring every angle of the roof is secure. With these defences in place, the stage is set for the roofing material itself.

Step 6: Applying the Roofing Material

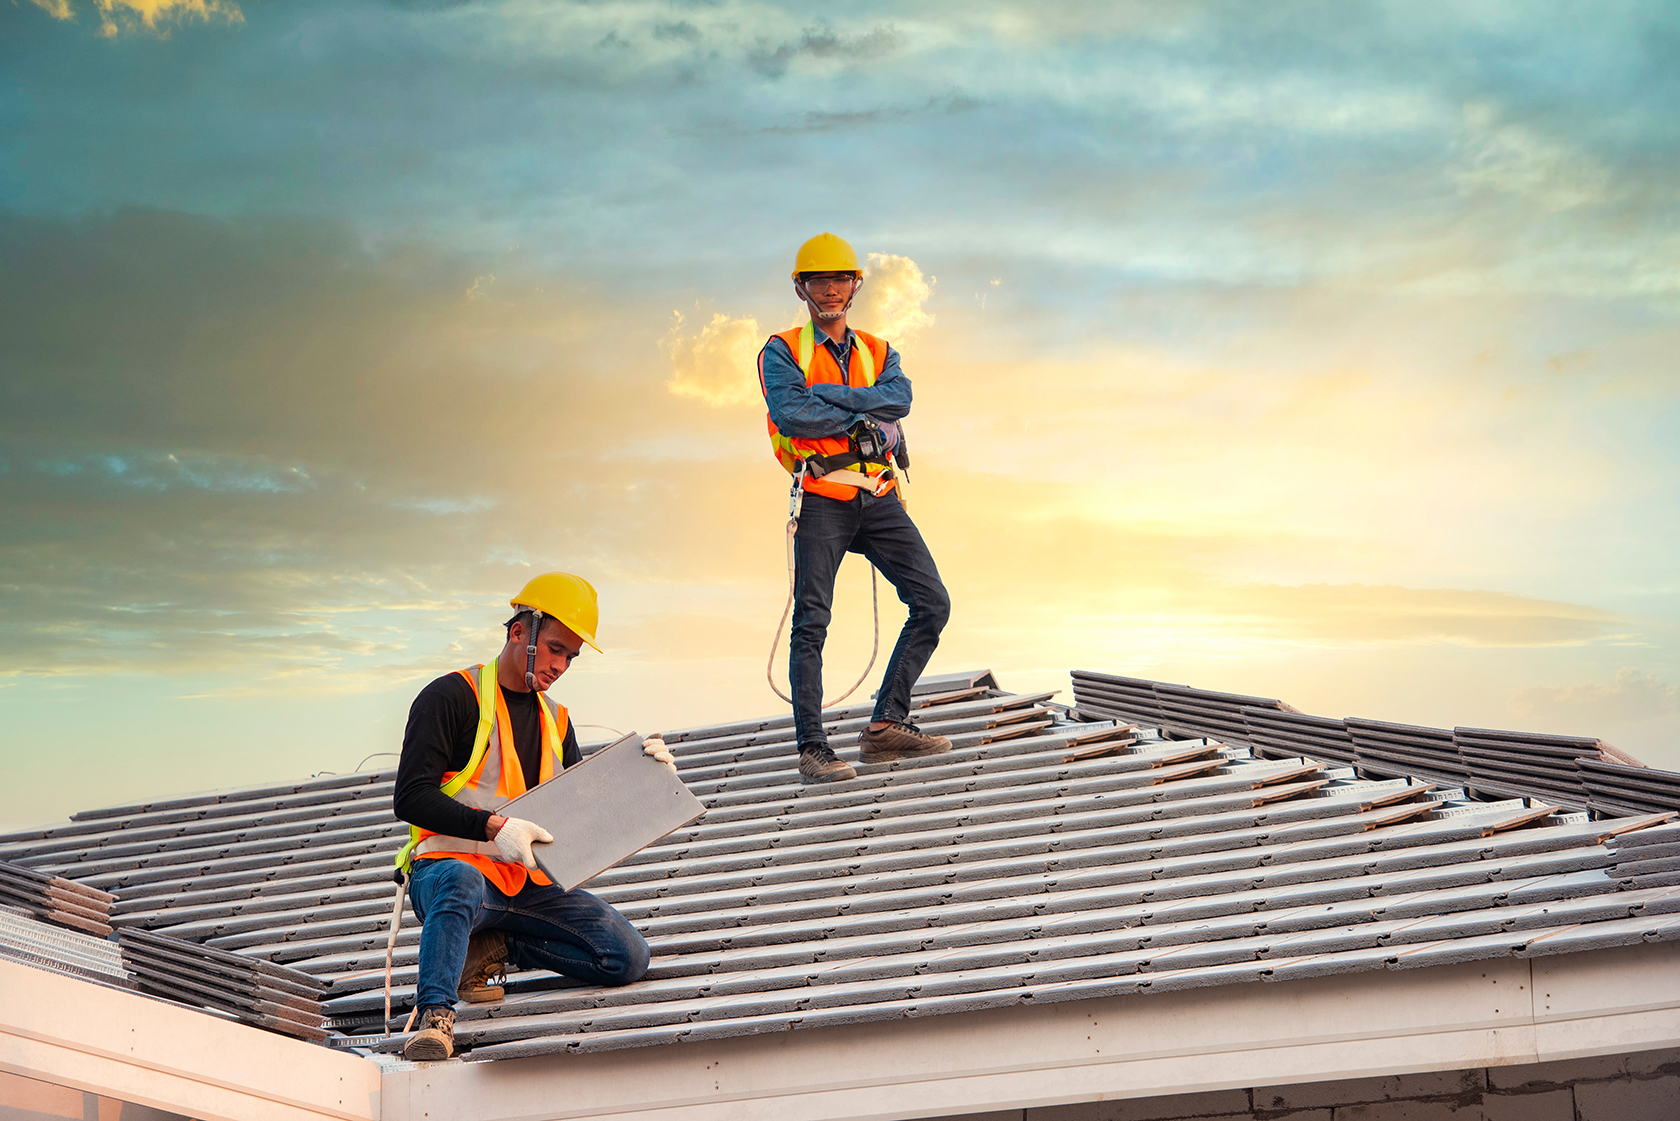
The heart of the project comes alive as roofers lay the roofing material. Asphalt shingles are a popular choice for their affordability and style, though metal, tile, or slate offer unique benefits. Starting at the roof’s base, workers layer the material upward, overlapping each row to shed water effectively. They secure shingles with nails or adhesive, following precise patterns to ensure durability. Proper ventilation, like ridge vents, is also installed to regulate temperature. This step transforms the roof’s appearance and function, relying on the strong foundation built earlier.

Step 7: Finishing with Inspection and Cleanup

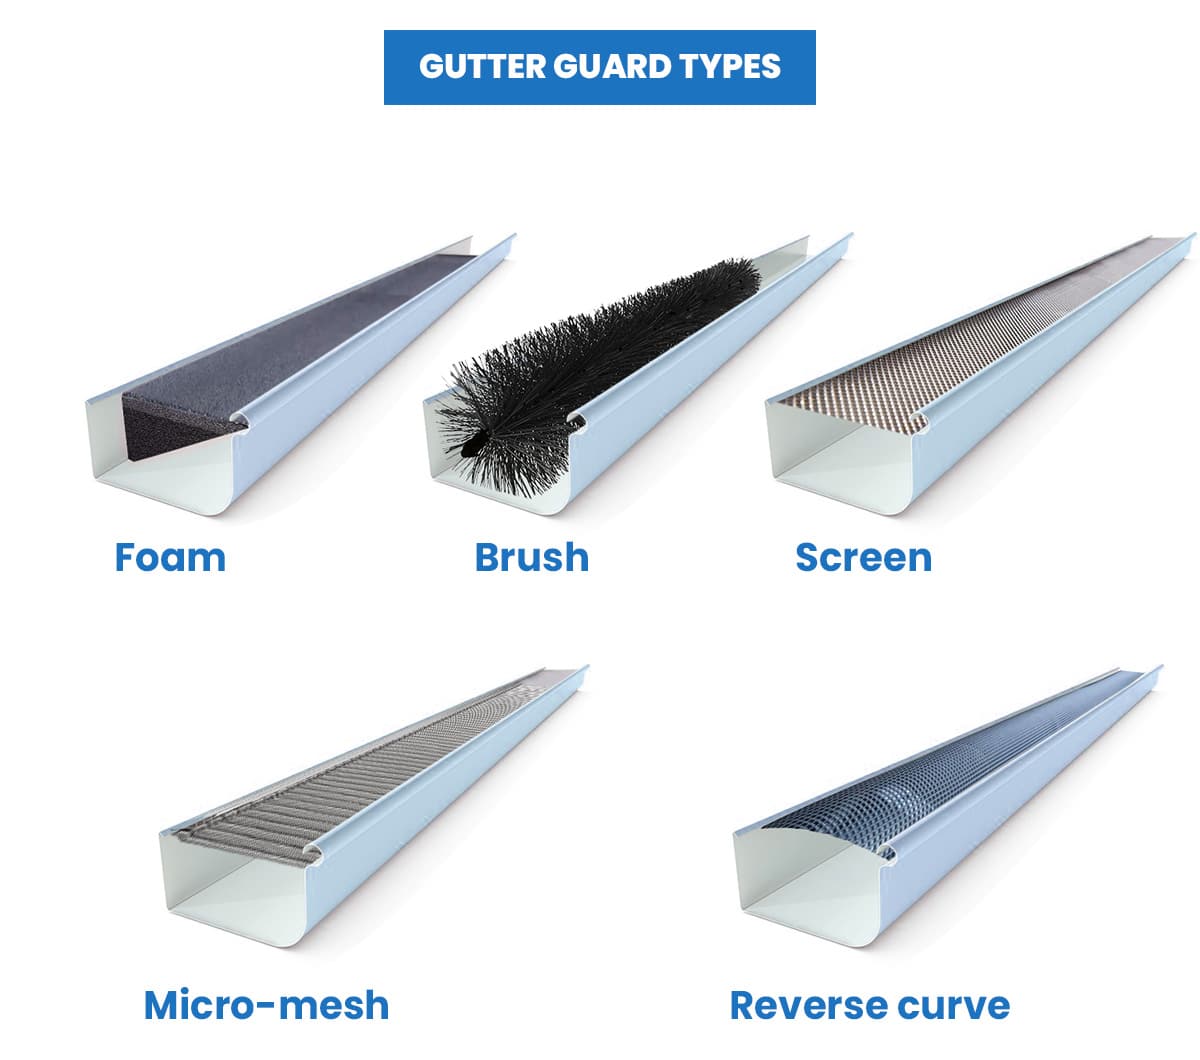
The final step brings everything together. Roofers inspect every detail, checking for loose shingles or unsealed flashing. They ensure the roof meets building codes and performs flawlessly. The site is then cleaned thoroughly, with workers sweeping for stray nails to keep your yard safe. Homeowners often receive a walkthrough to admire the work and learn maintenance tips, like clearing gutters regularly. This final touch ensures your new roof not only looks great but also protects your home for years to come.

What Homeowners Should Expect

A typical roof installation for a 1,500 to 2,000 square foot home takes one to three days, though complex designs or weather delays can extend this. Costs range from $5,000 to $15,000 for asphalt shingles, depending on your region and materials. Hiring a licensed, insured roofing contractor ensures quality and peace of mind. Expect some noise and mess, but a good team minimizes disruption, leaving you with a roof that feels like a fresh start.

Choosing the Right Roofing Material

Your roof’s material shapes its look and longevity. Asphalt shingles, affordable and versatile, last 15 to 30 years. Metal roofing, durable and energy-efficient, can endure 40 to 70 years. Tile or slate offers elegance and a lifespan of 50 years or more, though it’s heavier and costlier. Each choice builds on the installation process, with the steps tailored to the material’s needs.

Tips to Ensure a Smooth Experience

Choose a reputable roofing contractor with strong reviews and proper credentials. Prepare your home by moving pets indoors and notifying neighbors about the noise. Schedule during dry weather to avoid delays. Ask about warranties on materials and workmanship to protect your investment. These steps help you feel confident and excited about your new roof.

Conclusion

A new roof is more than a project, it’s a promise of safety and beauty for your home. The seven steps of the roof installation process, from inspection to final cleanup, work together to create a lasting shield. Each phase builds on the last, ensuring your roof stands strong against the elements. By understanding this process, you can approach your roofing project with clarity and trust. Ready to start? Connect with a skilled roofing contractor and take the first step toward a home that feels secure and renewed.

The post Done in Seven Steps: The Roof Installation Process appeared first on Pro Craft Home Products.


source https://www.procrafthomeproducts.com/done-in-seven-steps-the-roof-installation-process/

Monday, August 25, 2025

Is Your Attic Ventilation Working?

Your attic might be out of sight, but it’s not out of mind when it comes to your home’s health. Proper attic ventilation keeps your house comfortable, energy-efficient, and free from costly damage. But how do you know if your attic ventilation is doing its job? Poor ventilation can lead to a host of problems, from skyrocketing energy bills to mould growth that threatens your family’s health. In this guide, we’ll walk you through the signs of inadequate ventilation, how to check your system, and simple steps to fix it. Let’s ensure your attic is working as hard as the rest of your home.

What Is Attic Ventilation and Why Does It Matter?

Attic Ventilation
How attic ventilation systems work with intake and exhaust vents

Attic ventilation refers to the system that allows fresh air to flow into and out of your attic, regulating temperature and moisture. It typically involves a combination of intake vents (like soffit vents under the eaves) and exhaust vents (like ridge vents or gable vents on the roof). This airflow prevents heat buildup in summer, reduces moisture in winter, and protects your roof and insulation year-round.

Without proper ventilation, your attic can become a breeding ground for problems. Excess heat can damage shingles, increase cooling costs, and make your home uncomfortable. Trapped moisture can lead to mould, Mildew, and wood rot, which can weaken your home’s structure. According to the U.S. Department of Energy, effective attic ventilation can reduce cooling costs by up to 15%, making it a critical part of home maintenance.

Signs Your Attic Ventilation Isn’t Working

Is your attic ventilation up to par? Here are key indicators that something’s off:

  1. Hot Upper Floors: If the bedrooms on your top floor feel like a sauna in summer, your attic may not be venting heat effectively. Poor ventilation traps hot air, forcing your HVAC system to work harder.
  2. High Energy Bills: Spikes in your cooling or heating costs could point to ventilation issues. When hot air lingers in the attic, your air conditioner struggles to keep up, driving up energy expenses.
  3. Mould or Mildew Smells: A musty odour in your attic or upper rooms suggests moisture buildup, a common result of poor ventilation. Mould can harm air quality and lead to health issues.
  4. Ice Dams in Winter: If you notice icicles forming along your roof’s edges in winter, inadequate ventilation may be causing warm attic air to melt snow, which refreezes as ice dams, damaging your roof.
  5. Visible Roof Damage: Check your shingles. If they’re curling, cracking, or ageing prematurely, excessive heat from poor ventilation could be the culprit.
  6. Condensation or Frost: Inspect your attic for water droplets or frost on the underside of the roof. These are telltale signs of trapped moisture due to insufficient airflow.

If you spot any of these issues, it’s time to take a closer look at your ventilation system.

How to Check If Your Attic Ventilation Is Working

You don’t need to be a home improvement expert to evaluate your attic ventilation. Here’s a step-by-step guide to assess it yourself:

1. Inspect Your Vents:

  • Soffit Vents: Crawl into your attic or look under the eaves from outside. Are the soffit vents clear of insulation, debris, or paint? Blocked vents restrict airflow.
  • Exhaust Vents: Check ridge vents, gable vents, or attic fans. Ensure they’re free of obstructions like bird nests or leaves.

2. Feel for Airflow:

  • On a windy day, hold a tissue or lightweight cloth near your soffit vents. If it moves, air is flowing in. Similarly, check exhaust vents for outgoing airflow.

3. Measure Attic Temperature:

  • Use a thermometer to compare your attic’s temperature to the outdoor temperature. In summer, the attic should be within 10–20°F of the outside air. A hotter attic signals poor ventilation.

4. Look for Moisture:

  • Check for signs of water damage, such as stained wood, rusted nails, or mould. These indicate that moisture isn’t escaping properly.

5. Test Your Attic Fan (if applicable):

  • If you have a powered attic fan, turn it on and listen for the motor. A quiet or non-working fan may need repair or replacement.

For a precise assessment, consider hiring a professional to measure airflow or using a hygrometer to check humidity levels. A well-ventilated attic typically maintains humidity below 50%.

Common Causes of Poor Attic Ventilation

Understanding why your ventilation isn’t working can help you fix it. Common culprits include:

  • Blocked Vents: Insulation, debris, or improper installation can clog intake or exhaust vents, stifling airflow.
  • Inadequate Vent Size: Older homes may have undersized vents that can’t handle modern insulation or roofing materials.
  • Lack of Balance: Ventilation requires equal intake and exhaust. Too few soffit vents or an overreliance on exhaust vents disrupts airflow.
  • Broken Attic Fans: If your system relies on a powered fan, a malfunction can halt ventilation entirely.
  • Poor Design: Some homes lack proper vent placement, such as missing ridge vents or insufficient soffit coverage.

Each issue has a solution, but identifying the root cause is the first step.

How to Improve Your Attic Ventilation

How to Improve Your Attic Ventilation
Soffit vent installation boosts attic airflow

If your ventilation isn’t working, don’t worry, there are practical fixes to restore airflow and protect your home:

  1. Clear Blockages: Remove debris, insulation, or other obstructions from vents. Install vent chutes if insulation is covering the soffit vents.
  2. Add or Upgrade Vents: Consider installing additional soffit vents or a ridge vent to balance intake and exhaust. A roofing contractor can recommend the right vent-to-square-footage ratio (typically 1:150, per building codes).
  3. Install an Attic Fan: For homes with persistent heat issues, a solar-powered or electric attic fan can boost airflow. Ensure it’s sized correctly for your attic.
  4. Improve Insulation: Proper insulation works hand-in-hand with ventilation to regulate temperature. Replace damaged or outdated insulation to enhance efficiency.
  5. Consult a Professional: For complex issues, a roofing or HVAC expert can assess your system and recommend upgrades, such as turbine vents or powered exhaust systems.

The Benefits of Proper Attic Ventilation

Fixing your attic ventilation offers immediate and long-term advantages:

  • Lower Energy Costs: Efficient ventilation reduces strain on your HVAC system, cutting cooling and heating bills.
  • Extended Roof Lifespan: By preventing heat and moisture damage, ventilation protects shingles and underlayment, delaying costly roof replacements.
  • Improved Indoor Air Quality: Proper airflow reduces mould and Mildew, creating a healthier home environment.
  • Year-Round Comfort: A well-ventilated attic keeps your home cooler in summer and prevents ice dams in winter.

When to Call a Professional

While some checks and fixes are DIY-friendly, certain situations call for expert help:

  • Persistent mould or structural damage.
  • Complex vent installations or roof modifications.
  • Electrical work for attic fans.
  • Uncertainty about building codes or ventilation ratios.

A professional can ensure your system meets local codes and performs optimally, saving you time and money in the long run.

Final Thoughts

Your attic ventilation plays a quiet but critical role in your home’s health and efficiency. By recognising the signs of poor ventilation, checking your system regularly, and making necessary improvements, you can prevent costly repairs and keep your home comfortable. Start with a simple inspection today, clear those vents, feel for airflow, and monitor temperature and humidity. If problems persist, don’t hesitate to call a professional to get your attic back on track. A well-ventilated attic isn’t just a luxury; it’s a necessity for a healthy, energy-efficient home.

The post Is Your Attic Ventilation Working? appeared first on Pro Craft Home Products.


source https://www.procrafthomeproducts.com/is-your-attic-ventilation-working/

Friday, August 22, 2025

Why Gutter Guards Are Bad?

Gutter guards promise to keep your gutters free of debris, but many homeowners find they don’t live up to expectations. Marketed as a hassle-free solution to clogged gutters, these systems, often called screens, covers, or helmets can create more problems than they solve. If you’re wondering are gutter guards worth it or searching for reasons why gutter guards are bad, this article explores the real issues based on homeowner experiences and expert insights. From maintenance challenges to high gutter guard cost, here’s why gutter guards may not be the best choice for your home. At Pro Craft Home Products, we’re committed to helping you make informed decisions about your home’s exterior.

Common Problems with Gutter Guards

Despite their appeal, gutter guards come with significant drawbacks that can frustrate homeowners. Here are the top reasons they may not work as advertised.

1. They Don’t Eliminate Maintenance

The main pitch for gutter guards is less gutter cleaning, but they’re far from maintenance-free. Small debris like pine needles, seeds, or shingle granules can slip through even the best gutter guards, causing clogs over time. For example, micro-mesh guards, often touted as top-tier, still require cleaning every few months in areas with heavy tree cover. Homeowners expecting a “set it and forget it” solution may be disappointed when they’re back on the ladder.

2. Cleaning Is More Complicated

Cleaning gutter guards can be trickier than cleaning open gutters. Debris trapped under screens or meshes often requires removing the guards or using specialized tools, making the process time-consuming. This complexity can increase gutter guard cost over time, especially if you need professional help. For reliable cleaning solutions, explore our professional gutter cleaning services to keep your gutters in top shape without the hassle.

3. Small Debris Causes Big Problems

Even the best gutter guards struggle with tiny debris like pine needles or maple seeds. These particles accumulate, reducing water flow and creating blockages. Over time, trapped debris can decompose, fostering moss or algae growth that may spread to your roof, causing costly damage. This is a key reason why gutter guards are bad for homes surrounded by trees like pines or oaks.

4. Aesthetic and Structural Concerns

Gutter guards can affect your home’s look and structural integrity. Some systems, like hood guards, protrude noticeably, clashing with your home’s design. The added weight of guards and debris can also strain the fascia, potentially causing it to bend or detach. In snowy climates, this extra weight increases the risk of gutter damage, making gutter guards a risky choice for some homes.

5. High Costs with Questionable Savings

Why are gutter guards so expensive? Installation costs can be steep, with DIY home depot gutter guards ranging from $170 to $700 for a 200-foot system and professional gutter guard installation costing $4,000 to $7,000. While guards may reduce cleaning frequency, the savings rarely justify the expense. Annual professional cleaning, costing $100 to $360, is often more cost-effective. For expert advice on cost-efficient solutions, check our gutter services.

6. Risk of Roof Damage

Improper gutter guard installation can void your roof warranty or cause leaks. Guards attached to shingles may create gaps where water seeps, leading to rot or mold. In cold climates, debris trapped by guards can contribute to ice dams, pushing water under shingles. These risks highlight why gutter guards may not be the protective solution they claim to be.

Types of Gutter Guards and Their Specific Issues

Five gutter guard types: foam, brush, screen, micro-mesh, and reverse curve.
Gutter Guard Types: Foam, Brush, Screen, Micro-mesh, Reverse Curve.

Different gutter guards have unique flaws, making it crucial to understand their limitations before investing.

  • Mesh Gutter Guards: These block larger debris but let small particles like pine needles through, requiring frequent cleaning. They’re popular but not foolproof.
  • Reverse-Curve (Hood) Guards: These rely on surface tension to guide water, but improper installation can cause water to overshoot, pooling near your foundation.
  • Foam Gutter Guards: Affordable and easy to install, foam guards degrade quickly (lasting 2-5 years) and are prone to mold growth.
  • Screen Gutter Guards: Budget-friendly options like Home Depot gutter guards are less effective against small debris and may warp under heavy loads.

For help choosing the right system, our gutter guard installation services ensure proper setup tailored to your home.

Environmental Factors That Worsen Gutter Guard Problems

Your home’s surroundings impact gutter guard performance. Consider these factors:

  • Heavy Tree Cover: Trees like maples or pines drop small debris that clogs guards, increasing maintenance.
  • Harsh Winters: Snow and ice add weight, promoting ice dams and gutter damage.
  • High Rainfall: Heavy rain can overwhelm guards, especially if debris reduces water flow, causing overflow.

These challenges make gutter guards less practical for some homeowners.

Alternatives to Gutter Guards

If gutter guards aren’t ideal, consider these cost-effective alternatives:

  • Professional Gutter Cleaning: Annual or biannual cleaning (costing $100-$360) is often cheaper than the gutter guard cost. Our gutter cleaning services offer a hassle-free solution.
  • Oversized Gutters: Larger gutters handle more debris and water, reducing clogs.
  • Tree Trimming: Reducing tree cover minimises debris, lowering cleaning frequency.
  • DIY Cleaning: If safe, clean gutters twice yearly using proper safety gear.

Alternatives to Gutter Guards

If gutter guards aren’t ideal, consider these cost-effective alternatives:

  • Professional Gutter Cleaning: Annual or biannual cleaning (costing $100-$360) is often cheaper than gutter guard cost. Our gutter cleaning services offer a hassle-free solution.
  • Seamless Gutters vs. Traditional Gutters: Seamless gutters, crafted from a single piece of material, offer a sleek, leak-resistant design that reduces debris buildup and maintenance. Unlike traditional gutters, which are pieced together and prone to leaks at the joints, seamless options are custom-fitted to your home, improving durability and reducing clogs. While seamless gutters come with a higher upfront cost, traditional gutters are more affordable and easier to install. To help you decide which option is right for your home, check out our full comparison of seamless vs. traditional gutters.
  • Oversized Gutters: Larger gutters handle more debris and water, reducing clogs.
  • Tree Trimming: Reducing tree cover minimizes debris, lowering cleaning frequency.
  • DIY Cleaning: If safe, clean gutters twice yearly using proper safety gear.

Tips for Homeowners Considering Gutter Guards

If you’re still considering gutter guards, follow these tips to avoid pitfalls:

  • Choose the Right Type: Micro-mesh guards suit small debris, while reverse-curve guards work for larger leaves. Our blog on choosing gutter guards offers detailed guidance.
  • Opt for Professional Installation: Proper setup prevents warranty issues and ensures performance. Contact us for expert gutter guard installation.
  • Plan for Maintenance: Budget for cleaning every 3-6 months in high-debris areas.
  • Check Roof Warranty: Ensure guards won’t void your warranty, especially if attached to shingles.
  • Weigh Costs vs. Benefits: Compare gutter guard cost to cleaning expenses to make an informed choice.

Have questions about whether our gutter guards are worth it? Contact us for a free quote and personalised advice.

Conclusion

Gutter guards may seem like a convenient fix, but their drawbacks, are complex maintenance, high gutter guard cost, and potential roof damage often outweigh the benefits. For many homeowners, especially in tree-heavy or harsh-weather areas, alternatives like professional cleaning or larger gutters are smarter choices. At Pro Craft Home Products, we’re here to help you find the best solution for your home. Before investing in gutter guards, weigh your options carefully to protect your home and budget.

The post Why Gutter Guards Are Bad? appeared first on Pro Craft Home Products.


source https://www.procrafthomeproducts.com/why-gutter-guards-are-bad/

Monday, August 18, 2025

How to Install Gutters in 12 Steps

Proper gutter installation isn’t just about keeping water off your walls; it’s about protecting your home’s foundation, roof structure, siding, and landscaping for years to come. Over the years, we’ve seen countless homes suffer from premature rot, mould growth, and basement flooding, all because of poorly installed or neglected gutter systems.

In this guide, we’ll walk you through the exact 12-step process professionals use to install gutters the right way, clean, efficient, and built to last, whether you’re a DIY enthusiast or a homeowner conducting due diligence before hiring a professional.

Tools & Materials You’ll Need

Tools & Materials to install gutters
Essential tools and materials used for gutter installation.

Before we begin, here’s what you’ll need:

●     Gutter sections (aluminium or vinyl)
●     Downspouts & elbows
●     Gutter hangers or brackets
●     Screws (preferably self-tapping)
●     Measuring tape, level, chalk line
●     Drill, tin snips, or a hacksaw
●     Gutter sealant
●    Ladder (with stabiliser if possible)
●     Safety gloves and eyewear

Technical Considerations for Long-Term Performance

Gutter Materials: What to Choose

Aluminium is preferred for its balance of durability, weight, and resistance to corrosion. Vinyl is more affordable but brittle in cold climates. Copper is premium and long-lasting, but costly.

Gutter Sizes: 5″ vs. 6″

Standard residential homes use 5-inch gutters. Large roofs or homes in heavy rainfall areas benefit from 6-inch systems, which carry more water and reduce overflow risk.

Downspout Sizing & Flow Rates

Use 2×3″ downspouts for standard 5″ gutters, and 3×4″ downspouts for 6″ gutters. Proper sizing prevents clogs and ensures rapid water discharge.

Slope vs. Level Appearance

Professionally installed gutters often look level from the ground, even though they are slightly sloped. This is achieved by a consistent slope across long runs with precise measurements.

Fastener Types: Screws Over Nails

Use corrosion-resistant, self-piercing screws. Avoid nails; they loosen over time due to temperature swings and water weight.

Step 1: Plan the System & Measure Your Roofline

Before you cut or drill anything, start by evaluating your roof layout. Identify the total linear footage for gutters and determine where downspouts should go. Water naturally flows to the lowest point, so use that logic to decide ideal drainage spots. Measure the fascia board length with precision.

Step 2: Establish a Proper Slope

Once you know your lengths, it’s time to create a slope that ensures water flows toward the downspouts. Use a chalk line to mark a drop of ¼ inch for every 10 feet. This simple but vital measurement determines whether your gutters will drain or pool.

Step 3: Inspect and Prepare the Fascia Board

With your slope line in place, inspect the fascia (the wooden board beneath the edge of your roof). It must be solid and rot-free since the entire gutter system anchors to it. Replace any damaged sections now; it’s harder to correct this later.

Step 4: Mark and Pre-Drill for Gutter Hangers

Using your chalk line as a guide, mark where each gutter hanger or bracket will be installed. These will bear the system’s full weight when loaded with rainwater. Space them evenly, every 24 to 36 inches, and drill pilot holes to make the next step smoother.

Step 5: Cut Gutter Sections to Match Your Layout

Now that your support system is planned, cut your gutter lengths to match each section of your roof. Dry-fit them on the ground first, accounting for corners, joins, and overlaps. You should also prepare end caps and outlets during this stage.

Step 6: Attach End Caps and Downspout Outlets

Seal both ends of each gutter run by installing end caps with a weather-resistant gutter sealant. When you plan your downspouts, cut holes for the outlet fittings and attach them firmly. Water will exit through these, so alignment and sealing matter here.

Step 7: Join Multiple Gutter Sections (If Needed)

Long rooflines often require multiple gutter sections. Overlap sections by 2 to 4 inches and seal the seam. Always ensure the overlap leads downhill to guide water smoothly, not trap it. This keeps the joints leak-free and structurally secure.

Step 8: Install the Gutter Hangers and Secure to Fascia

With your gutters prepped, go back to your pilot holes and begin attaching the gutter hangers. These support the gutter from underneath or inside (depending on the type). Keep everything aligned with the slope, and check your line frequently as you go.

Step 9: Mount the Gutter Sections into Hangers

Now lift each gutter section into place and fasten it into the installed hangers. Start from the high end of your slope and work toward the downspout end. This order helps maintain alignment and control any adjustments during mounting.

Step 10: Assemble and Attach the Downspouts

With gutters installed, connect the outlet fittings to elbows and downspout tubing. Route the downspouts along the wall using brackets every 4–5 feet. Add elbows at the base to direct water away from your home’s foundation.

Step 11: Seal All Joints and Conduct a Water Test

Apply gutter sealant at all seams, corners, and outlet points. After it cures, flush the system with water from a hose to check for proper flow and any leaks. Look closely at joints and outlets; this is your final chance to fix problems before the system goes live.

Step 12: Clean Up and Add Finishing Touches

Remove any metal shavings, leftover screws, or debris. Secure splash blocks or drainage extensions at the bottom of each downspout to direct water safely away. Then stand back and check everything, clean lines, solid flow, and a tidy, functional install.

Expert Tips From the Roofer

●     Avoid Nails: Always use screws. Nails loosen over time, especially with heavy rainfall or snow accumulation.
●     Install Gutter Guards: They reduce debris buildup and can double the lifespan of your gutter system with proper maintenance.
●     Account for Expansion: Always leave 1/8″ per 10 feet of space at joints to accommodate temperature shifts.

Who to Call for Professional Gutter Installation

Professional Gutter Installater
An expert gutter installer works on a residential roof.

If you’re looking for high-quality gutter installation without the guesswork, it’s time to call the professionals. At Procraft Home Products, we’ve helped homeowners across Toledo protect their properties from costly water damage with durable, precision-installed gutter systems. We don’t take shortcuts, and we treat your home as if it were our own.

Frequently Asked Questions

Q: How long do gutters typically last?

Most aluminium gutter systems last 20 to 30 years with proper maintenance. Copper can last over 50 years.

Q: Can I install gutters without a slope?

No. Gutters without slope will cause water to pool and overflow. A consistent ¼ inch drop every 10 feet is essential.

Q: How far should downspouts be from the foundation?

Downspouts should extend at least 3 to 5 feet from the home to prevent water from saturating the soil near the foundation.

Q: Is DIY gutter installation safe?

It can be, but only with the proper equipment and knowledge. Most injuries occur due to falls from ladders or improper handling of sharp materials.

Q: How often should gutters be cleaned?

At least twice a year, in spring and fall. More often, if you live near trees or experience heavy storms.

The post How to Install Gutters in 12 Steps appeared first on Pro Craft Home Products.


source https://www.procrafthomeproducts.com/how-to-install-gutters-in-12-steps/

Thursday, August 14, 2025

How to Blow Insulation in Your Attic

Insulating your attic is one of the most effective ways to improve your home’s energy efficiency, lower utility bills, and maintain a comfortable indoor temperature. Blown-in insulation, also known as loose-fill insulation, is a popular choice for attics due to its ability to fill gaps and cover irregular spaces. Whether you’re a homeowner looking to tackle this project yourself or considering professional help, this guide will walk you through the process of blowing insulation in your attic, including preparation, materials, equipment, and tips for success.

What Is Blown-In Insulation?

Blown-in insulation is a loose, lightweight material, typically cellulose or fiberglass, that’s blown into your attic using a specialized machine. This method allows the insulation to spread evenly across the attic, filling small gaps, corners, and hard-to-reach areas that traditional batt insulation might miss. The result is a seamless thermal barrier that prevents heat loss in winter and keeps cool air inside during summer.

Blown-In Insulation in toledo ohio
Professional blown-in insulation installed by our expert team for maximum attic efficiency

Why Choose Blown-In Insulation?

  • Energy Efficiency: Blown-in insulation can reduce energy bills by 15–25%, depending on your climate and existing insulation levels.
  • Comprehensive Coverage: It conforms to any attic shape, ensuring no gaps or air leaks.
  • Quick Installation: Professionals can complete the job in a few hours, and DIYers can finish in a weekend with the right equipment.
  • Eco-Friendly Options: Cellulose insulation is often made from recycled materials, such as newspapers, making it a sustainable choice.

Types of Blown-In Insulation

Before starting, select the appropriate material for your specific needs. The two most common types are:

Cellulose Insulation

  • Composition: Made from 70–85% recycled paper, treated with fire-retardant chemicals like boric acid.
  • R-Value: Approximately 3.2–3.8 per inch, ideal for colder climates.
  • Pros: Eco-friendly, excellent soundproofing, cost-effective ($0.50–$1.50 per square foot).
  • Cons: Can settle over time, reducing R-value; may absorb moisture if not properly sealed.

Fiberglass Insulation

  • Composition: Made of fine glass fibers with minimal chemical additives.
  • R-Value: Approximately 2.2–2.7 per inch, slightly lower than cellulose.
  • Pros: Lightweight, fire-resistant, doesn’t absorb moisture.
  • Cons: Can cause skin and lung irritation during installation; slightly more expensive ($0.75–$2.00 per square foot).

The R-value measures thermal resistance; the higher the R-value, the better the insulation. Check your local building codes or the U.S. Department of Energy’s recommendations for the ideal R-value in your climate zone (typically R-38 to R-60 for attics).

Tools and Materials You’ll Need for DIY Blown-In Insulation

If you decide to tackle the project yourself, gather these tools and materials before starting:

  • Insulation Blower Machine: Available for rent at home improvement stores like Home Depot or Lowe’s (rental cost: $50–$100 per day).
  • Blown-In Insulation: Cellulose or fiberglass, enough to achieve the desired R-value (calculate bags based on attic square footage and R-value needs).
  • Protective Gear: Safety goggles, dust mask or respirator, gloves, and long-sleeve clothing to protect against irritation (especially with fiberglass).
  • Ladder: A sturdy ladder to access the attic safely.
  • Measuring Tape and Ruler: To measure attic dimensions and insulation depth.
  • Attic Baffles or Ventilation Chutes: To maintain airflow and prevent insulation from blocking vents.
  • Utility Knife and Boards: For cutting insulation bags and creating a stable working surface in the attic.
  • Flashlight or Headlamp: For visibility in dark attic spaces.
  • Vapour Barrier or Sealant: To address air leaks before insulating (optional but recommended).

Calculating Insulation Needs

To determine how much insulation you need:

  1. Measure Your Attic: Calculate the square footage (length × width). For example, a 30’ × 40’ attic is 1,200 square feet.
  2. Check R-Value Requirements: Use the U.S. Department of Energy’s R-value map to find the recommended R-value for your region (e.g., R-38 for moderate climates, R-60 for colder areas).
  3. Calculate Bags Needed: Insulation bags list coverage per bag based on R-value. For example, a bag of cellulose insulation might cover 40 square feet at R-38. Divide your attic’s square footage by the coverage per bag to estimate the number of bags (e.g., 1,200 ÷ 40 = 30 bags).

Pro Tip: Overestimate slightly to account for settling (especially with cellulose) and ensure you achieve the desired R-value.

Step-by-Step Guide to Blowing Insulation in Your Attic

Follow these steps to blow insulation in your attic safely and effectively:

Step 1: Prepare the Attic

Proper preparation ensures safety and maximizes insulation performance.

  • Inspect the Attic: Check for mold, water damage, or pest issues. If you suspect asbestos (common in homes built before 1980), hire a professional to test and remove it before proceeding.
  • Seal Air Leaks: Use caulk or spray foam to seal gaps around vents, pipes, and wiring penetrations. Air leaks reduce insulation effectiveness and increase energy costs.
  • Install Baffles: Place ventilation chutes at soffit vents to maintain airflow and prevent insulation from blocking vents, which can lead to moisture buildup.
  • Clear Obstructions: Remove old insulation, debris, or stored items to create a clean workspace.
  • Set Up a Work Platform: Lay plywood or boards across joists to create a stable surface for moving in the attic.

Step 2: Set Up the Insulation Blower

Rent a blower machine and set it up outside or in a well-ventilated area (like a garage) to minimize dust indoors.

  • Read the Manual: Follow the manufacturer’s instructions for your specific blower model.
  • Load the Machine: Break up insulation bags and feed them into the hopper. Avoid overpacking to prevent clogs.
  • Attach the Hose: Connect the long, flexible Hose to the blower and run it into the attic. Have a partner manage the machine while you work in the attic.

Step 3: Blow the Insulation

  • Start at the Far End: Begin at the farthest corner of the attic and work toward the access point to avoid trampling the insulation.
  • Hold the HoseHose Properly: Keep the HoseHose 2–3 feet above the floor and move it in a sweeping motion to distribute insulation evenly.
  • Monitor Depth: Use a ruler to check insulation depth periodically to ensure you’re meeting the target R-value (e.g., 12–15 inches for R-38 with cellulose).
  • Avoid Over-Blocking Vents: Ensure insulation doesn’t cover soffit vents or exhaust fans, as this can cause moisture issues or overheating.

Step 4: Clean Up and Inspect

  • Check Coverage: Walk carefully across the attic (on boards) to confirm even coverage and no missed spots.
  • Clean the Blower: Return the rental machine clean to avoid extra fees.
  • Dispose of Waste: Recycle empty insulation bags and clean up any spilled material.
  • Test Comfort: After a few days, monitor your home’s temperature and energy bills to gauge the insulation’s effectiveness.

Safety Tips for Blowing Insulation

Working with blown-in insulation requires caution to protect your health and home:

  • Wear Protective Gear: Fiberglass can irritate skin, eyes, and lungs. Use a respirator, not just a dust mask, for extended exposure.
  • Ensure Proper Ventilation: Open windows or use fans to reduce dust inhalation.
  • Avoid Electrical Hazards: Keep insulation away from recessed lights, chimneys, or other heat sources unless they’re rated for insulation contact (IC-rated fixtures).
  • Work with a Partner: Have someone assist with the blower machine and monitor safety from below.
  • Check Load Capacity: Ensure your attic floor can support the added weight of insulation, especially in older homes.
Safety Tips for Blowing Insulation
A technician wearing safety gear while blowing attic insulation

Costs of Blowing Insulation in Your Attic

DIY Costs

  • Insulation Material: $0.50–$2.00 per square foot (e.g., $600–$2,400 for a 1,200-square-foot attic).
  • Blower Rental: $50–$100 per day.
  • Additional Supplies: $100–$300 for protective gear, baffles, and sealant.
  • Total: $750–$2,800, depending on attic size and material.

Professional Costs

  • Labor and Materials: $1.25–$3.15 per square foot (e.g., $1,500–$3,800 for a 1,200-square-foot attic).
  • Factors Affecting Cost: Attic size, accessibility, existing insulation removal, and regional labor rates.

Many homeowners find professional installation worth the cost for peace of mind, especially in complex attics or when rebates (like those from utility companies) offset expenses.

Benefits of Blown-In Attic Insulation

Investing in blown-in insulation offers long-term rewards:

  • Lower Energy Bills: Save 15–25% on heating and cooling costs annually.
  • Improved Comfort: Maintain consistent indoor temperatures year-round.
  • Environmental Impact: Reduce energy consumption and carbon footprint, especially with eco-friendly cellulose.
  • Increased Home Value: Energy-efficient homes appeal to buyers and may qualify for tax credits or rebates.

Common Mistakes to Avoid

  • Skipping Air Sealing: Failing to seal leaks reduces insulation effectiveness by up to 30%.
  • Overloading the Blower: This can cause clogs and uneven distribution.
  • Ignoring Ventilation: Blocking vents leads to moisture buildup and mold growth.
  • Underestimating R-Value: Too little insulation won’t deliver energy savings.
  • Neglecting Safety: Skipping protective gear or working alone increases health and injury risks.

When to Call a Professional

If your attic has structural issues, limited access, or requires significant prep work (e.g., removing old insulation or addressing mold), hire a professional. They can also provide energy audits to pinpoint inefficiencies and recommend the best insulation type for your home. For a free estimate or to discuss your project, reach out to the team at Pro Craft Home Products for professional service in the Toledo, Ohio area.

Conclusion

Blowing insulation in your attic is a smart investment for comfort, energy savings, and sustainability. Whether you choose DIY or professional installation, proper preparation, the right materials, and attention to safety are key to success. By following this guide, you can achieve a well-insulated attic that keeps your home cozy and your energy bills low.

Ready to get started? Calculate your insulation needs, gather your supplies, or reach out to a trusted contractor to transform your attic into an energy-efficient powerhouse.

The post How to Blow Insulation in Your Attic appeared first on Pro Craft Home Products.


source https://www.procrafthomeproducts.com/how-to-blow-insulation-in-your-attic/

Friday, August 8, 2025

Warning Signs You Need a New Roof Before It’s Too Late

A roof isn’t just shingles and nails; it’s your home’s first defence against rain, wind, heat, and time. It protects your family, your investment, and everything underneath it. But like everything else, roofs age. And when they do, they don’t always show obvious signs, until it’s too late.
In this guide, we’ll walk you through how long different roofing materials typically last, the warning signs you should never ignore, and how to plan before minor wear turns into major damage.

How Long Does a Roof Last?

Every roof has a life expectancy. How long yours lasts depends on the materials used, the quality of installation, local weather conditions, and how well it’s maintained.

Roofing Material Expected Lifespan
Asphalt Shingles (3-tab) 15–20 years
Architectural Asphalt Shingles 20–30 years
Wood Shingles or Shakes 20–40 years
Metal Roofing 40–70 years
Clay or Concrete Tiles 50–100 years
Slate 75–150 years
Flat Roofs (EPDM/TPO) 15–30 years

Keep in mind, just because a roof can last “up to 30 years” doesn’t mean it will. Factors like installation, ventilation, and storm exposure can reduce that number significantly.

What Shortens Roof Lifespan?

Even high-end roofing materials can fail early if certain conditions are present. Here’s what to watch for:

  • Harsh weather conditions, including hail, snow, heavy winds, and intense UV exposure, can accelerate material degradation.
  • Poor installation: sloppy work leads to premature leaks and system failure.
  • Inadequate ventilation: heat and moisture in your attic can warp wood and damage shingles.
  • Neglected gutters: clogged gutters cause water to back up under the roofline.
  • Overhanging trees: shade, debris, and moss growth speed up deterioration.
  • Improper flashing: weak points around vents and chimneys invite water in.

Warning Signs You May Need a New Roof

Roof issues often start small, and that’s the danger. Many homeowners wait until it’s leaking inside the home. Here’s what to look for before it gets to that point:

  • Shingles are curling, cracked, or missing
  • You find granules in gutters or downspouts
  • Streaks of moss, mold, or algae are growing
  • Water stains on ceilings or in the attic
  • Visible sagging along the roofline
  • Soft or spongy decking underfoot
  • Rusty, loose, or damaged flashing

If your roof is more than 15–20 years old and showing even one or two of these signs, it’s time to schedule a professional inspection.

What You Can Do as a Homeowner

You don’t need to climb on your roof to take care of it. Here are a few smart, simple habits:

  • Inspect your roof twice a year, spring and fall are ideal.
  • After a major storm, look for missing shingles, loose flashing, or debris buildup.
  • Check your attic regularly for damp insulation, water stains, or sunlight peeking through.
  • Clean gutters at least twice a year to prevent backup and rot.
  • Trim trees that hang over your roofline to reduce debris and moss growth.

When to Call a Roofing Professional

Two roofers working on a metal tile roof at sunset, wearing safety gear.

Not all roof problems are easy to spot; some need a trained eye. Call a licensed roofer if you see signs of damage, your roof is aging, missing shingles or leaks, or you’ve had recent storm impact. If you’re unsure about repair vs. replacement, an inspection can help. A trusted roof replacement contractor can guide you before small issues become costly.

Tips to Extend Your Roof’s Lifespan

  • Stay on top of small repairs, don’t ignore missing or lifted shingles
  • Maintain attic ventilation to reduce heat and moisture damage
  • Avoid power washing your roof; use soft washing if needed
  • Replace flashing and sealants every few years
  • Choose algae-resistant shingles in humid areas

Routine maintenance now can add years to your roof and save thousands later.

Average Roof Replacement Cost

Most homeowners will need a roof replacement at least once or twice in their lives. The average cost ranges from $5,000–$15,000 depending on the size and material. Spring through early fall is ideal for scheduling the job, and while a full tear-off costs more, it offers better durability than an overlay. Always check local permit requirements and hire a licensed contractor. For more details, check out our guide on the average cost of residential roof replacement in Ohio.

Frequently Asked Questions

Q: How long does a typical asphalt shingle roof last?
A: About 20 to 30 years with proper maintenance.

Q: What is the longest-lasting roofing material?
A: Slate roofs can last over 100 years.

Q: How do I know if my roof needs to be replaced?
A: Look for missing shingles, leaks, sagging, or visible wear.

Q: Can I replace just a few shingles instead of the whole roof?
A: Yes, but only if the damage is isolated and the rest is sound.

Q: Does homeowners’ insurance cover roof replacement?
A: It depends; damage from storms is often covered, but wear and tear is not.

Q: When is the best time of year to replace a roof?
A: Spring through early fall offers ideal weather conditions.

Q: How often should I inspect my roof?
A: At least twice a year and after any major storm.

Q: Can poor attic ventilation affect my roof’s lifespan?
A: Yes, it can cause heat and moisture buildup that leads to early failure.

Q: Are moss or algae on my roof dangerous?
A: Yes, it traps moisture and can cause shingles to rot.

Q: How much does a full roof replacement cost?
A: It varies, but asphalt shingles typically range from $5,000 to $15,000.

Who to Call?

If your roof is showing signs of age or damage, don’t wait until it turns into a bigger problem. Call Pro Craft Home Products your trusted local roofing contractor in Toledo. Our team is experienced, reliable, and ready to assess your roof with honesty and care. Whether it’s a small repair or a full replacement, we’re here to help you protect your home the right way.

Final Thoughts

A strong, reliable roof isn’t just a luxury; it’s essential. Knowing how long your roof is supposed to last, understanding the early warning signs, and taking proactive steps can save you from stress, costly damage, and emergency repairs.

If your roof is getting older or showing signs of wear, don’t wait until water is dripping into your living room. Call a trusted roofing contractor, get a professional opinion, and take control of your home’s protection before it’s too late.

The post Warning Signs You Need a New Roof Before It’s Too Late appeared first on Pro Craft Home Products.


source https://www.procrafthomeproducts.com/warning-signs-you-need-a-new-roof-before-its-too-late/

Monday, August 4, 2025

12 Tips for Finding and Fixing Leaks in Your Roof

A leaky roof can quickly turn a cozy home into a damp disaster. Water stains on the ceiling, soggy insulation, or a musty attic smell are warning signs that demand action. This guide offers 12 practical tips to help homeowners spot and fix leaks, whether handling a quick patch or calling a roof repair company. With a troubleshooting table, a seasonal maintenance checklist, and a decision-making tool, this post equips you with everything needed to tackle leaks confidently and keep your home dry.

1. Start the Search in the Attic

Head to the attic with a flashlight to find the source of a leak. Look for wet spots, stained wood, or mold on rafters and insulation. Water can travel along beams, so a ceiling stain might trace back to a leak several feet away. Checking during rain helps spot active drips, making it easier to pinpoint the problem.

2. Stay Safe While Inspecting

Safety comes first when checking for leaks. Use a sturdy ladder with non-slip feet, secured with a stabilizer for stability. On steep roofs, wear a safety harness and avoid working in wet or windy weather. Non-slip shoes and a helper nearby add extra protection, ensuring you can inspect the roof without risking a fall.

3. Check Roof Penetrations

Vents, chimneys, and skylights are prime spots for leaks because their flashing can rust or loosen. Look for cracks or gaps in the metal or rubber seals around these areas. Replacing a damaged seal with a durable option, like those from trusted brands, can stop water fast. If climbing the roof feels risky, a roofing repair professional can take over.

4. Inspect Shingles and Tiles

Roofer inspecting asphalt shingles for signs of roof leaks.
Professional roof inspection for leaks and damage on asphalt shingles in Toledo, OH.

Cracked, curled, or missing shingles let water sneak in. Use binoculars or walk the roof carefully to spot damage, especially in areas exposed to heavy sun or wind. Replacing a shingle is a doable roof repair task: lift the damaged one, remove old nails, apply sealant, and secure a new shingle for a watertight fix. If you’re unsure about the damage or need a professional opinion, schedule a free roof inspection with Procraft Home Products.

5. Examine Roof Valleys

Valleys, where roof slopes meet, handle heavy water flow and can leak if flashing or underlayment fails. Clear debris like leaves or twigs that trap water, which can seep under shingles. Keeping valleys clean prevents hidden leaks that lead to costly damage over time.

6. Keep Gutters in Check

Clogged gutters cause water to pool, seeping under shingles or into walls. In winter, this can create ice dams that push water into the attic. Clean gutters every spring and fall to ensure proper drainage. Checking for loose gutter seams during cleaning can also stop water from creeping into the home.

7. Fix Nail Pops

Nail pops occur when nails loosen, lifting shingles and exposing the underlayment. Look for raised or missing nails in damaged areas. To fix, lift the shingle gently, remove the nail, apply roofing sealant, and secure a new shingle. This quick roofing repair can prevent small leaks from becoming big problems.

8. Apply a Temporary Patch for Emergencies

When a leak hits during a storm, a temporary patch can save the day. Spread roofing tar over small holes, then cover with a scrap shingle or plywood, sealing the edges tightly. This emergency roof repair buys time until a permanent fix is possible, but don’t let it become a long-term solution.

9. Opt for Eco-Friendly Sealants

For small leaks, choose low-VOC sealants that are better for the environment. These durable products outperform traditional caulk, which can crack quickly, and are widely available at hardware stores. Using eco-friendly sealants supports sustainable leaking roof repair while keeping the home dry.

10. Decide Between DIY and Professional Help

Not sure whether to tackle the repair or call a pro? A decision tree tool, available on the ProCraftHomeProducts.com resources page, guides you through key questions: Is the leak small and easy to reach? Comfortable with ladders? For complex areas like valleys or widespread damage, a roof repair contractor is the safer choice. This tool helps make smart decisions without risking costly errors.

11. Hire a Trusted Roof Repair Contractor

For major leaks or steep roofs, professional roof repair services are the way to go. Search “emergency roof repair near me” on Google Maps or ask neighbours for recommendations. Compare quotes from at least three roof repair contractors, asking about warranties, experience, and seasonal discounts to save money. Verify licenses and check reviews to ensure quality work that lasts.

12. Follow a Seasonal Maintenance Plan

Prevent leaks with a year-round plan, including attic ventilation to reduce heat and moisture buildup. Check soffit vents for blockages and ensure proper airflow to avoid trapped humidity, a common leak cause. Use this checklist to keep the roof in top shape:

  • Spring: Inspect shingles and flashing; clear debris.
  • Summer: Check vents and chimneys; trim overhanging branches.
  • Fall: Clean gutters; secure loose nails.
  • Winter: Monitor for ice dams; ensure attic ventilation. Download a detailed checklist from the ProCraftHomeProducts.com resources page for easy planning.

Troubleshooting Common Leak Symptoms

To help diagnose leaks quickly, use this table to match symptoms to likely causes and solutions:

Symptom Likely Cause Solution
Ceiling stain far from walls Leaky roof penetration (vent, chimney) Inspect and reseal flashing
Water near exterior walls Clogged gutters or ice dams Clean gutters; install ice-and-water barrier
Damp attic insulation Valley or shingle failure Check valleys; replace damaged shingles
Musty smell in attic Poor ventilation causing moisture Improve attic ventilation; check for leaks

This table, available on the ProCraftHomeProducts.com resources page, simplifies leak detection and guides next steps.

With these 12 tips and troubleshooting tools, homeowners can handle roof leaks with confidence, whether fixing a small drip or hiring trusted roof repair contractors. Stay proactive, keep repair costs down, and protect the home from water damage year-round.

The post 12 Tips for Finding and Fixing Leaks in Your Roof appeared first on Pro Craft Home Products.


source https://www.procrafthomeproducts.com/12-tips-for-finding-and-fixing-leaks-in-your-roof/

Top 10 Roofing Contractors in Toledo Ohio

If your roof took a beating this past winter or you just noticed shingles curling in the gutters, finding the right roofing contractor in To...